Documentation
Create targeted audiences based on user behavior to power your retargeting campaigns and improve ad relevance.
Building targeted audiences is essential for effective retargeting campaigns. With ad:personam's audience creation tools, you can segment users based on their website behavior and create highly relevant campaigns. This guide walks you through creating first-party audiences using the Universal Pixel system.
Understanding Audience Creation
Audience pixels help you segment website visitors into specific groups based on their interactions with your site. These segments become valuable for retargeting campaigns, allowing you to re-engage users who have shown interest in your products or services.
Key Benefits:
- Behavioral Targeting: Segment users based on specific actions they take
- Retargeting Power: Re-engage visitors who didn't convert initially
- Improved Relevance: Show more targeted ads to qualified audiences
- Performance Tracking: Monitor audience growth and engagement over time

Creating Your First Audience
Follow these steps to build a targeted audience in your ad:personam dashboard:
1. Access the Audiences Section
Navigate to your advertiser dashboard and click on the Audiences tab to view existing audiences and create new ones.
2. Start Creating a New Audience
Click the "Create New Audience" button to open the audience creation dialog.
3. Choose Your Audience Type
You'll see three audience options:
- First-Party Audience: Create audiences based on your website visitor data and conversions (covered in this guide)
- Third-Party Audience: Use pre-defined audience segments from data partners
- CRM Data Upload: Upload your customer data to create custom audiences
Select "First-Party Audience" to create audiences based on website behavior.
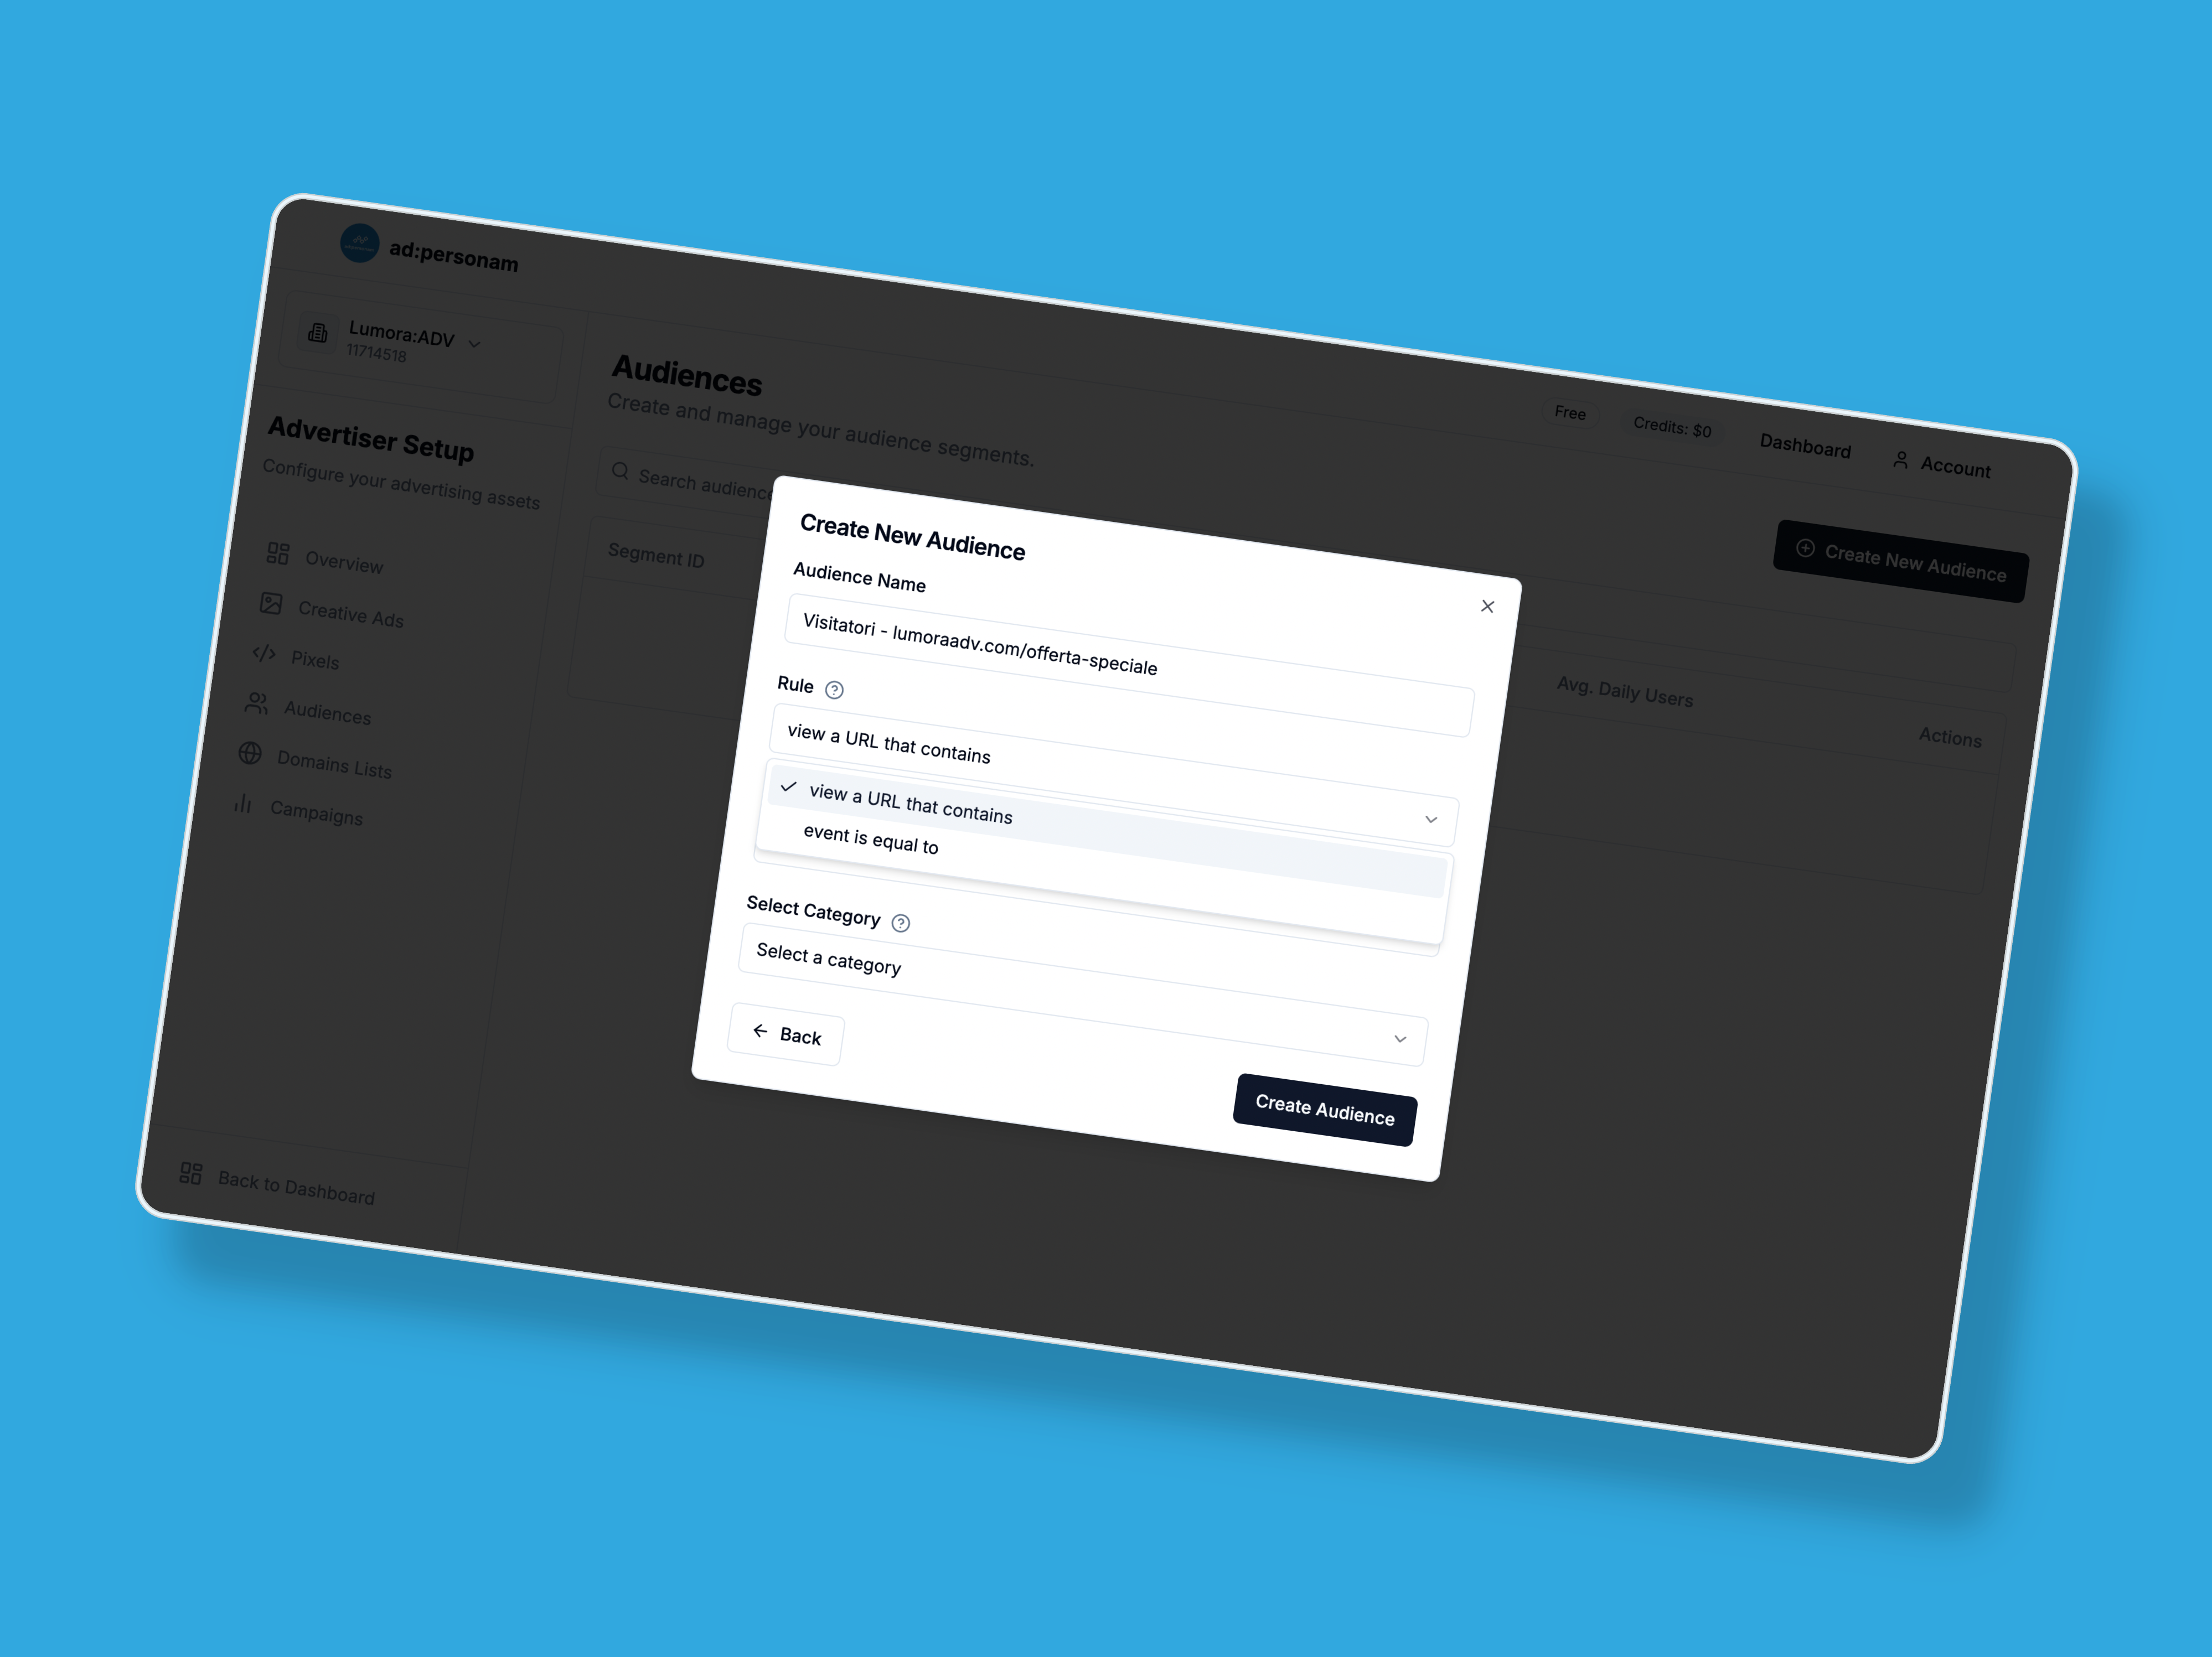
4. Configure Your Audience Settings
Name Your Audience: Give your audience a descriptive name that reflects the user behavior you're targeting (e.g., "Product Page Visitors" or "Cart Abandoners").
Set the Activation Rule: Choose how users will be added to your audience:
- "view a URL that contains": Adds users when they visit specific pages or URLs
- "event is equal to": Adds users when they perform specific actions
5. Define Your Audience Trigger
For URL-Based Audiences:
- Enter the URL or URL fragment that should trigger audience inclusion
- Examples: "/checkout", "/pricing", "/product-category"
- Choose the appropriate category to help organize your audience data
For Event-Based Audiences:
- Select from standard events that match the user action:
- PageView: General page visits
- LandingPage: Landing page visits from campaigns
- ItemView: Product or item page views
- AddToCart: Users who add items to cart
- InitiateCheckout: Users who start the checkout process
- AddPaymentInfo: Users who enter payment information
- Purchase: Completed purchases
- Lead: Lead generation events
6. Create Your Audience
Click "Create Audience" to generate your audience pixel and start collecting users who match your criteria.
Implementing Your Audience Pixel
For URL-Based Audiences
If you already have the Universal Pixel installed on your website, no additional code is needed. The system will automatically track visits to your specified URLs and add users to the audience.
For Event-Based Audiences
Copy the generated JavaScript code and implement it where the specific event occurs:
<!-- Xandr Universal Pixel - Purchase Event -->
<script>
pixie('event', 'Purchase');
</script>
<noscript><img src="https://ib.adnxs.com/pixie?pi=[UUID]&e=Purchase&script=0" width="1" height="1" style="display:none"/></noscript>
Implementation Steps:
- Access the code snippet by clicking the preview icon next to your audience
- Copy the provided script code
- Place the code on pages where the event should trigger
- Ensure the Universal Pixel initialization code is also installed on your site
Need help with pixel implementation? Check our main pixel creation guide for detailed Universal Pixel setup instructions.
Managing and Monitoring Your Audiences
Audience Dashboard
Once created, your audiences appear in the Audiences table where you can:
- Monitor Growth: Track average daily unique users being added
- View Performance: See audience creation dates and activity status
- Access Code: Re-export pixel code for implementation
- Analyze Trends: View detailed segment load charts showing audience growth over time
- Delete Audiences: Remove audiences you no longer need
Audience Analytics
Click the preview icon next to any audience to view:
- Daily Unique Users: Track how many unique users are added daily
- Total Loads: See total audience interactions over time
- Growth Charts: Visual representation of audience growth trends
- Implementation Code: Access the pixel code for that specific audience
Audience Status Indicators
- Active: Audience is actively collecting users (shows recent activity)
- Inactive: No recent user additions (may need pixel verification)
Best Practices for Audience Creation
Audience Naming Strategy
- Use descriptive names that clearly identify the user behavior
- Include the trigger type in the name (e.g., "Homepage Visitors - URL" or "Purchase Event - Conversion")
- Consider adding date ranges for time-sensitive campaigns
Segmentation Tips
- Funnel Stages: Create audiences for different stages of your sales funnel
- Product Categories: Segment by product interest or category views
- Engagement Levels: Differentiate between casual browsers and engaged prospects
- Conversion Events: Track users at different conversion milestones
Technical Considerations
- Verify Universal Pixel is properly installed before creating event-based audiences
- Test audience tracking in a staging environment when possible
- Monitor audience growth to ensure pixels are firing correctly
- Allow 24-48 hours for initial audience data to populate
Campaign Optimization
- Create both broad and narrow audience segments for testing
- Use audience performance data to refine your targeting criteria
- Combine multiple audience rules for more precise targeting
- Regularly review and update audience criteria based on campaign performance
Troubleshooting Common Issues
Audience Not Growing:
- Verify Universal Pixel is installed and firing
- Check that event-specific code is properly implemented
- Ensure URL patterns match actual site structure
Low Audience Numbers:
- Review if the trigger criteria are too restrictive
- Consider broadening URL patterns or event triggers
- Check if the target pages receive sufficient traffic
This comprehensive audience setup enables powerful retargeting campaigns that can significantly improve your advertising effectiveness and ROI.