Documentation
Learn how to upload HTML5 creatives on ad:personam Self Serve DSP, ensuring optimal ad performance. Follow these steps to consolidate assets, properly implement the clickTag parameter, and finalize your creative upload.
In the digital advertising world, HTML5 creatives offer dynamic and interactive ad experiences. Upload HTML5 banners to your ad:personam Self Serve DSP with this updated workflow guide.
Note: HTML5 ad uploads require a paid subscription plan.
Steps
- Go to Advertiser > Creative.
- Click Create New Ad and select HTML Ad.
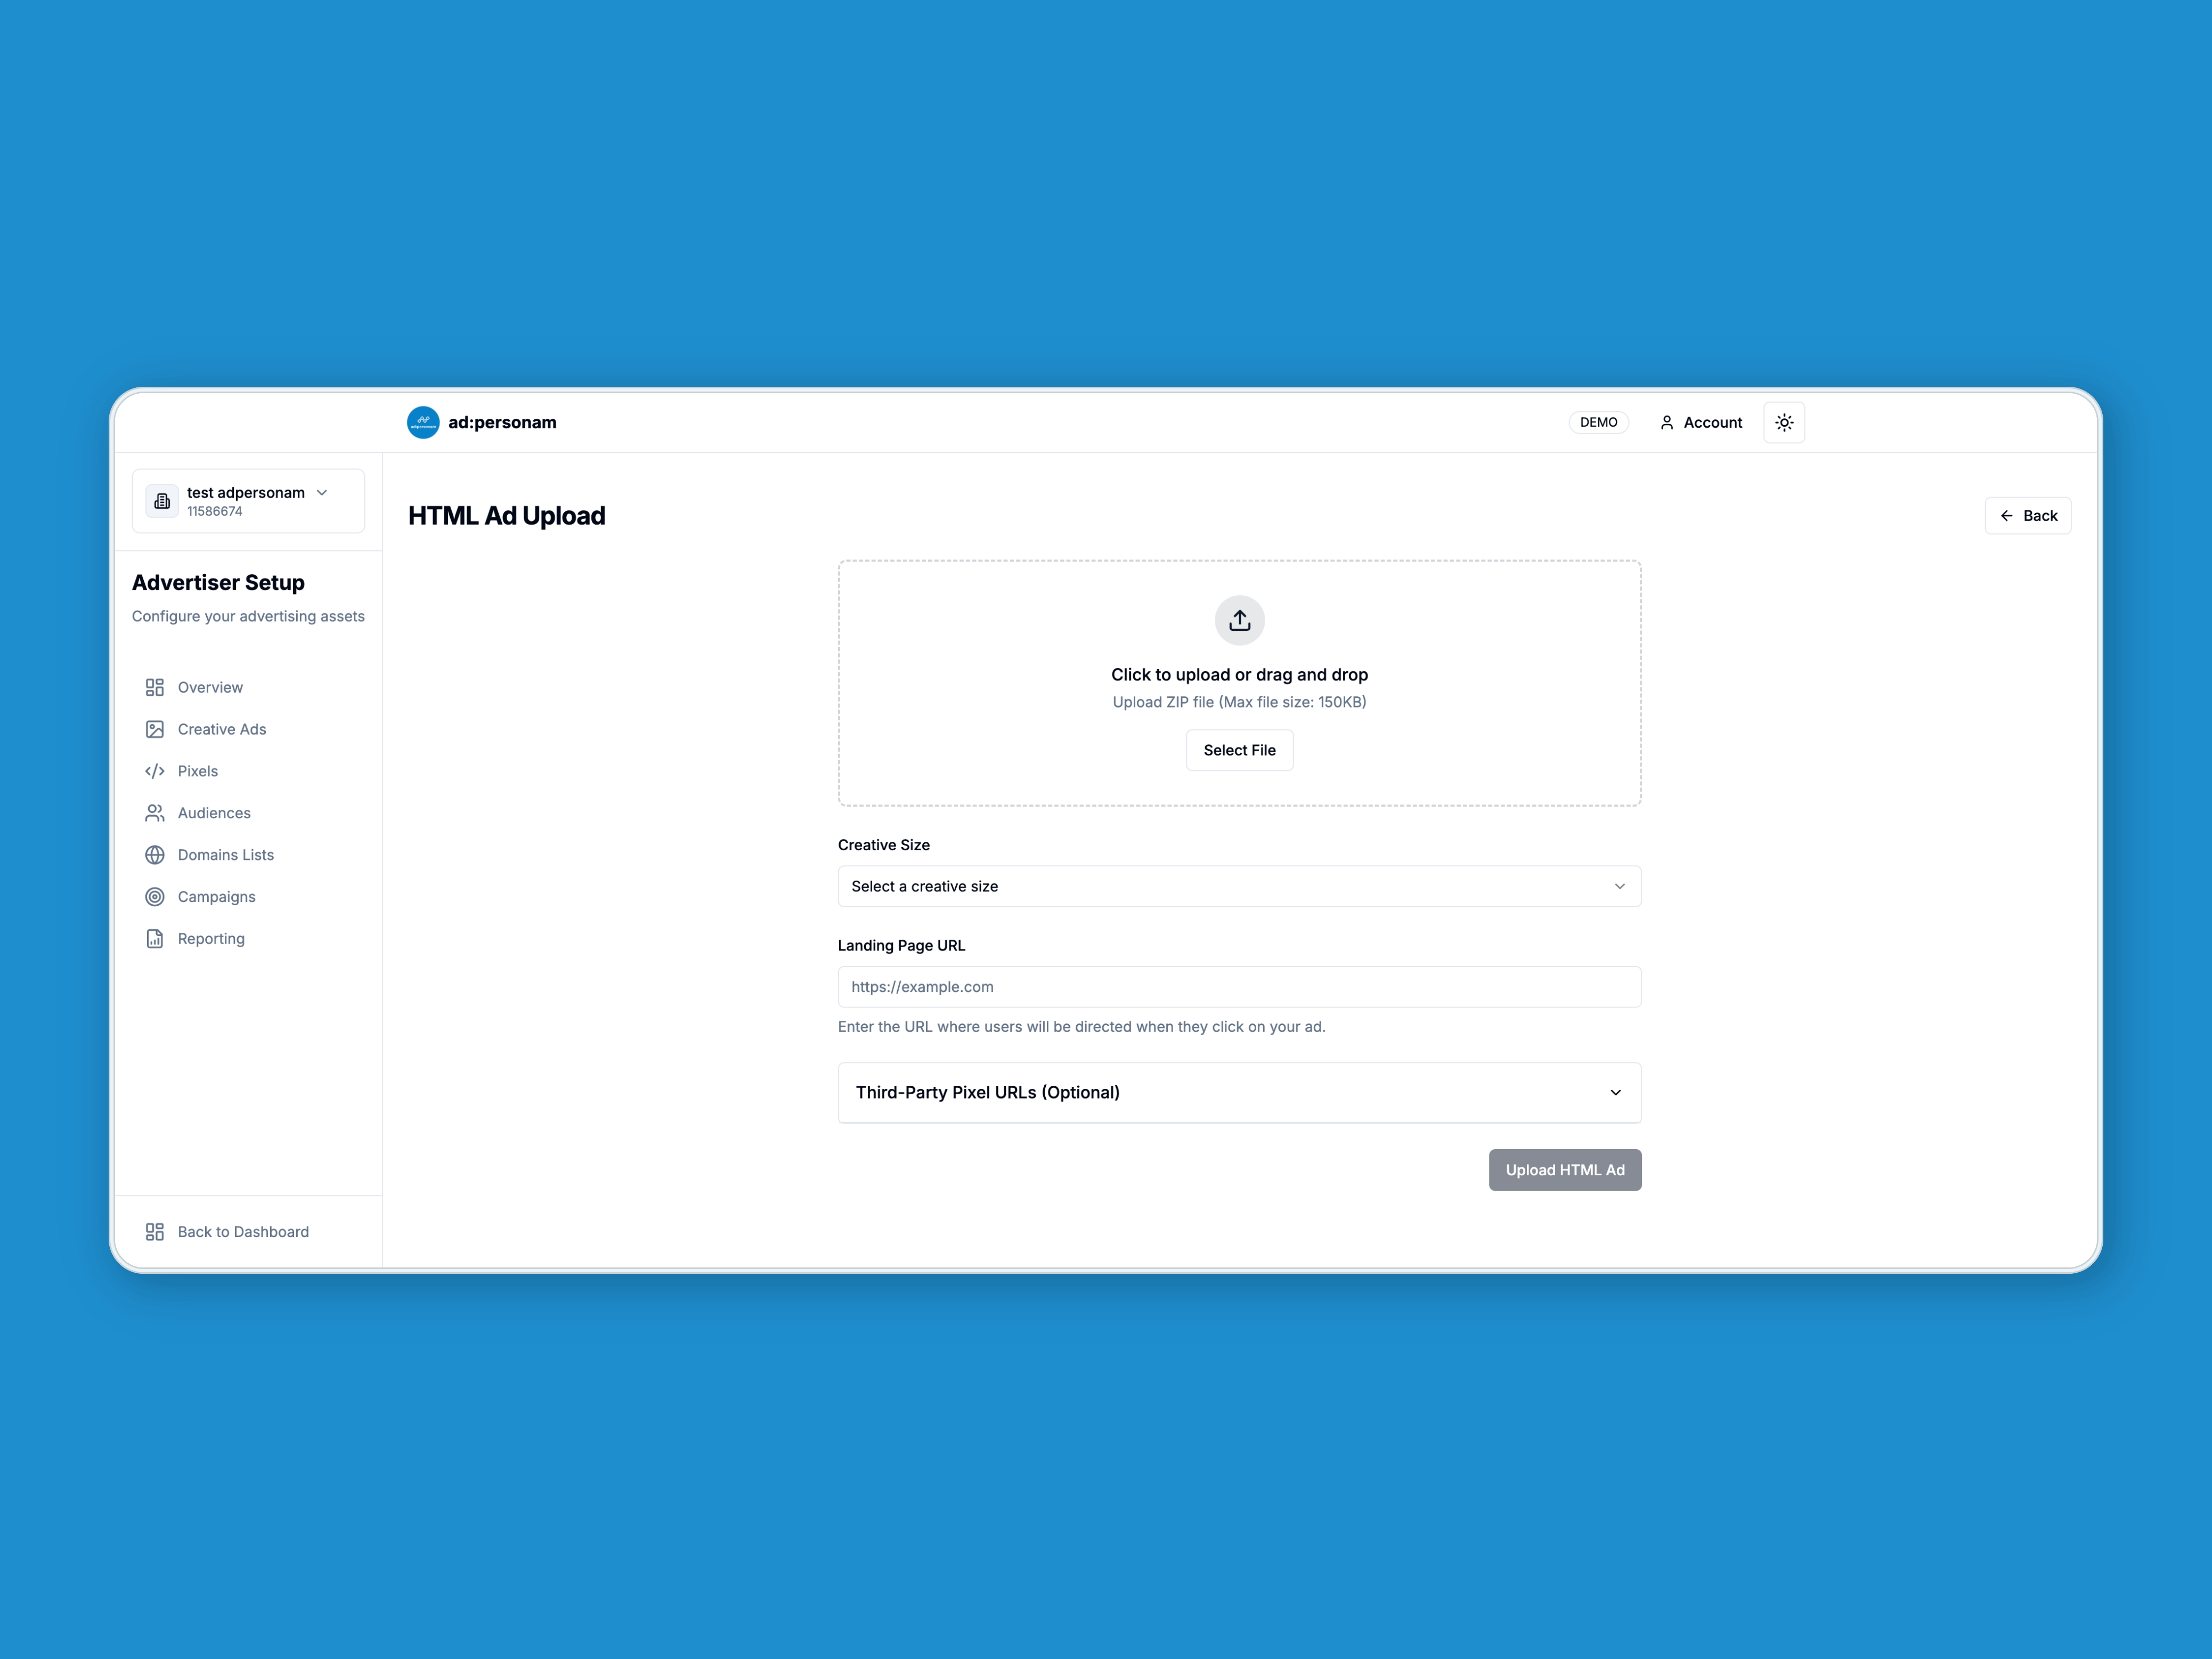
- Upload your HTML5 creative:
- Drag and drop your ZIP file into the upload area, or
- Click Select File to browse and choose your HTML5 ZIP package
- Select creative size:
- Choose the appropriate creative size from the dropdown menu to match your ad dimensions
- Fill in the required fields:
- Landing Page URL: Enter the URL where users will be directed when they click your ad
- Add third-party pixels (optional):
- Expand the Third-Party Pixel URLs section
- Add up to 3 pixel URLs for tracking (2 image pixels + 1 JavaScript pixel)
- Click Upload to submit your HTML5 creative.

⚠️ Validation Rules
- File format: ZIP files only
- File size: Maximum 150KB
- Structure requirements:
- Must include an
index.htmlfile at the root level (not in a subfolder) index.htmlmust have proper HTML structure with<html>,<head>, and<body>tags
- Must include an
- Creative size: Must select a size from the available options:
- 160×600, 120×600, 300×250, 728×90, 300×600, 970×250
- 468×60, 320×50, 300×50, 320×480, 480×320, 320×100
- Landing Page URL: Must be a valid URL starting with
https:// - Third-party pixel URLs: Must be valid URLs starting with
https://(optional) - Subscription requirement: Requires any paid plan to upload HTML5 ads
HTML5 Creative Requirements
ZIP File Structure
- Consolidate all components (HTML, CSS, JavaScript, images) into a single ZIP file
- Place the
index.htmlfile at the root level of the ZIP file - Ensure all assets are properly referenced with relative paths
ClickTag Implementation
Your HTML5 creative must properly implement the clickTag parameter for:
- Click Tracking: Accurate tracking of user interactions for performance analytics
- Landing Page Redirection: Proper redirection to your specified landing page
For detailed implementation guidance, refer to our ClickTag Parameter Guide.
Tips & Best Practices
- File Size Optimization: Keep your ZIP file under 150KB for fast loading and compliance
- Asset Organization: Use relative paths for all assets within your ZIP file
- Cross-Browser Testing: Test your HTML5 creative across different browsers before upload
- Responsive Design: Ensure your creative displays properly at the selected dimensions
- Landing Page Testing: Verify that your landing page URL works correctly
- ClickTag Testing: Test the clickTag functionality to ensure proper click tracking and redirection
Related
- Explore our display solutions: Display Advertising Platform
- Implement clickTag correctly: ClickTag Parameter Guide
- Supported banner sizes: Ad Banner Formats