Documentation
Your foundation for organized campaign management and advertising success.
Understanding the Advertiser Object
Think of an Advertiser as your central hub for organizing all advertising activities for a specific brand or business. It's the foundation that keeps everything organized and compliant.
What Makes an Advertiser Special?
Each advertiser acts as a secure, isolated container for all advertising assets:
- Creative ads (banners, videos, audio files)
- Conversion pixels for tracking and optimization
- Remarketing audiences built from your website visitors
- Domain lists (blocklists and allowlists for brand safety)
🔒 Important: All assets created under one advertiser are exclusive to that advertiser only. They cannot be shared or transferred to other advertisers, ensuring complete data privacy and organization.
Why This Matters
- For businesses: Keep your brand assets separate and secure
- For agencies: Manage multiple clients with complete isolation between accounts
- For compliance: Meet legal requirements with proper entity separation

🚀 Step-by-Step Setup Guide
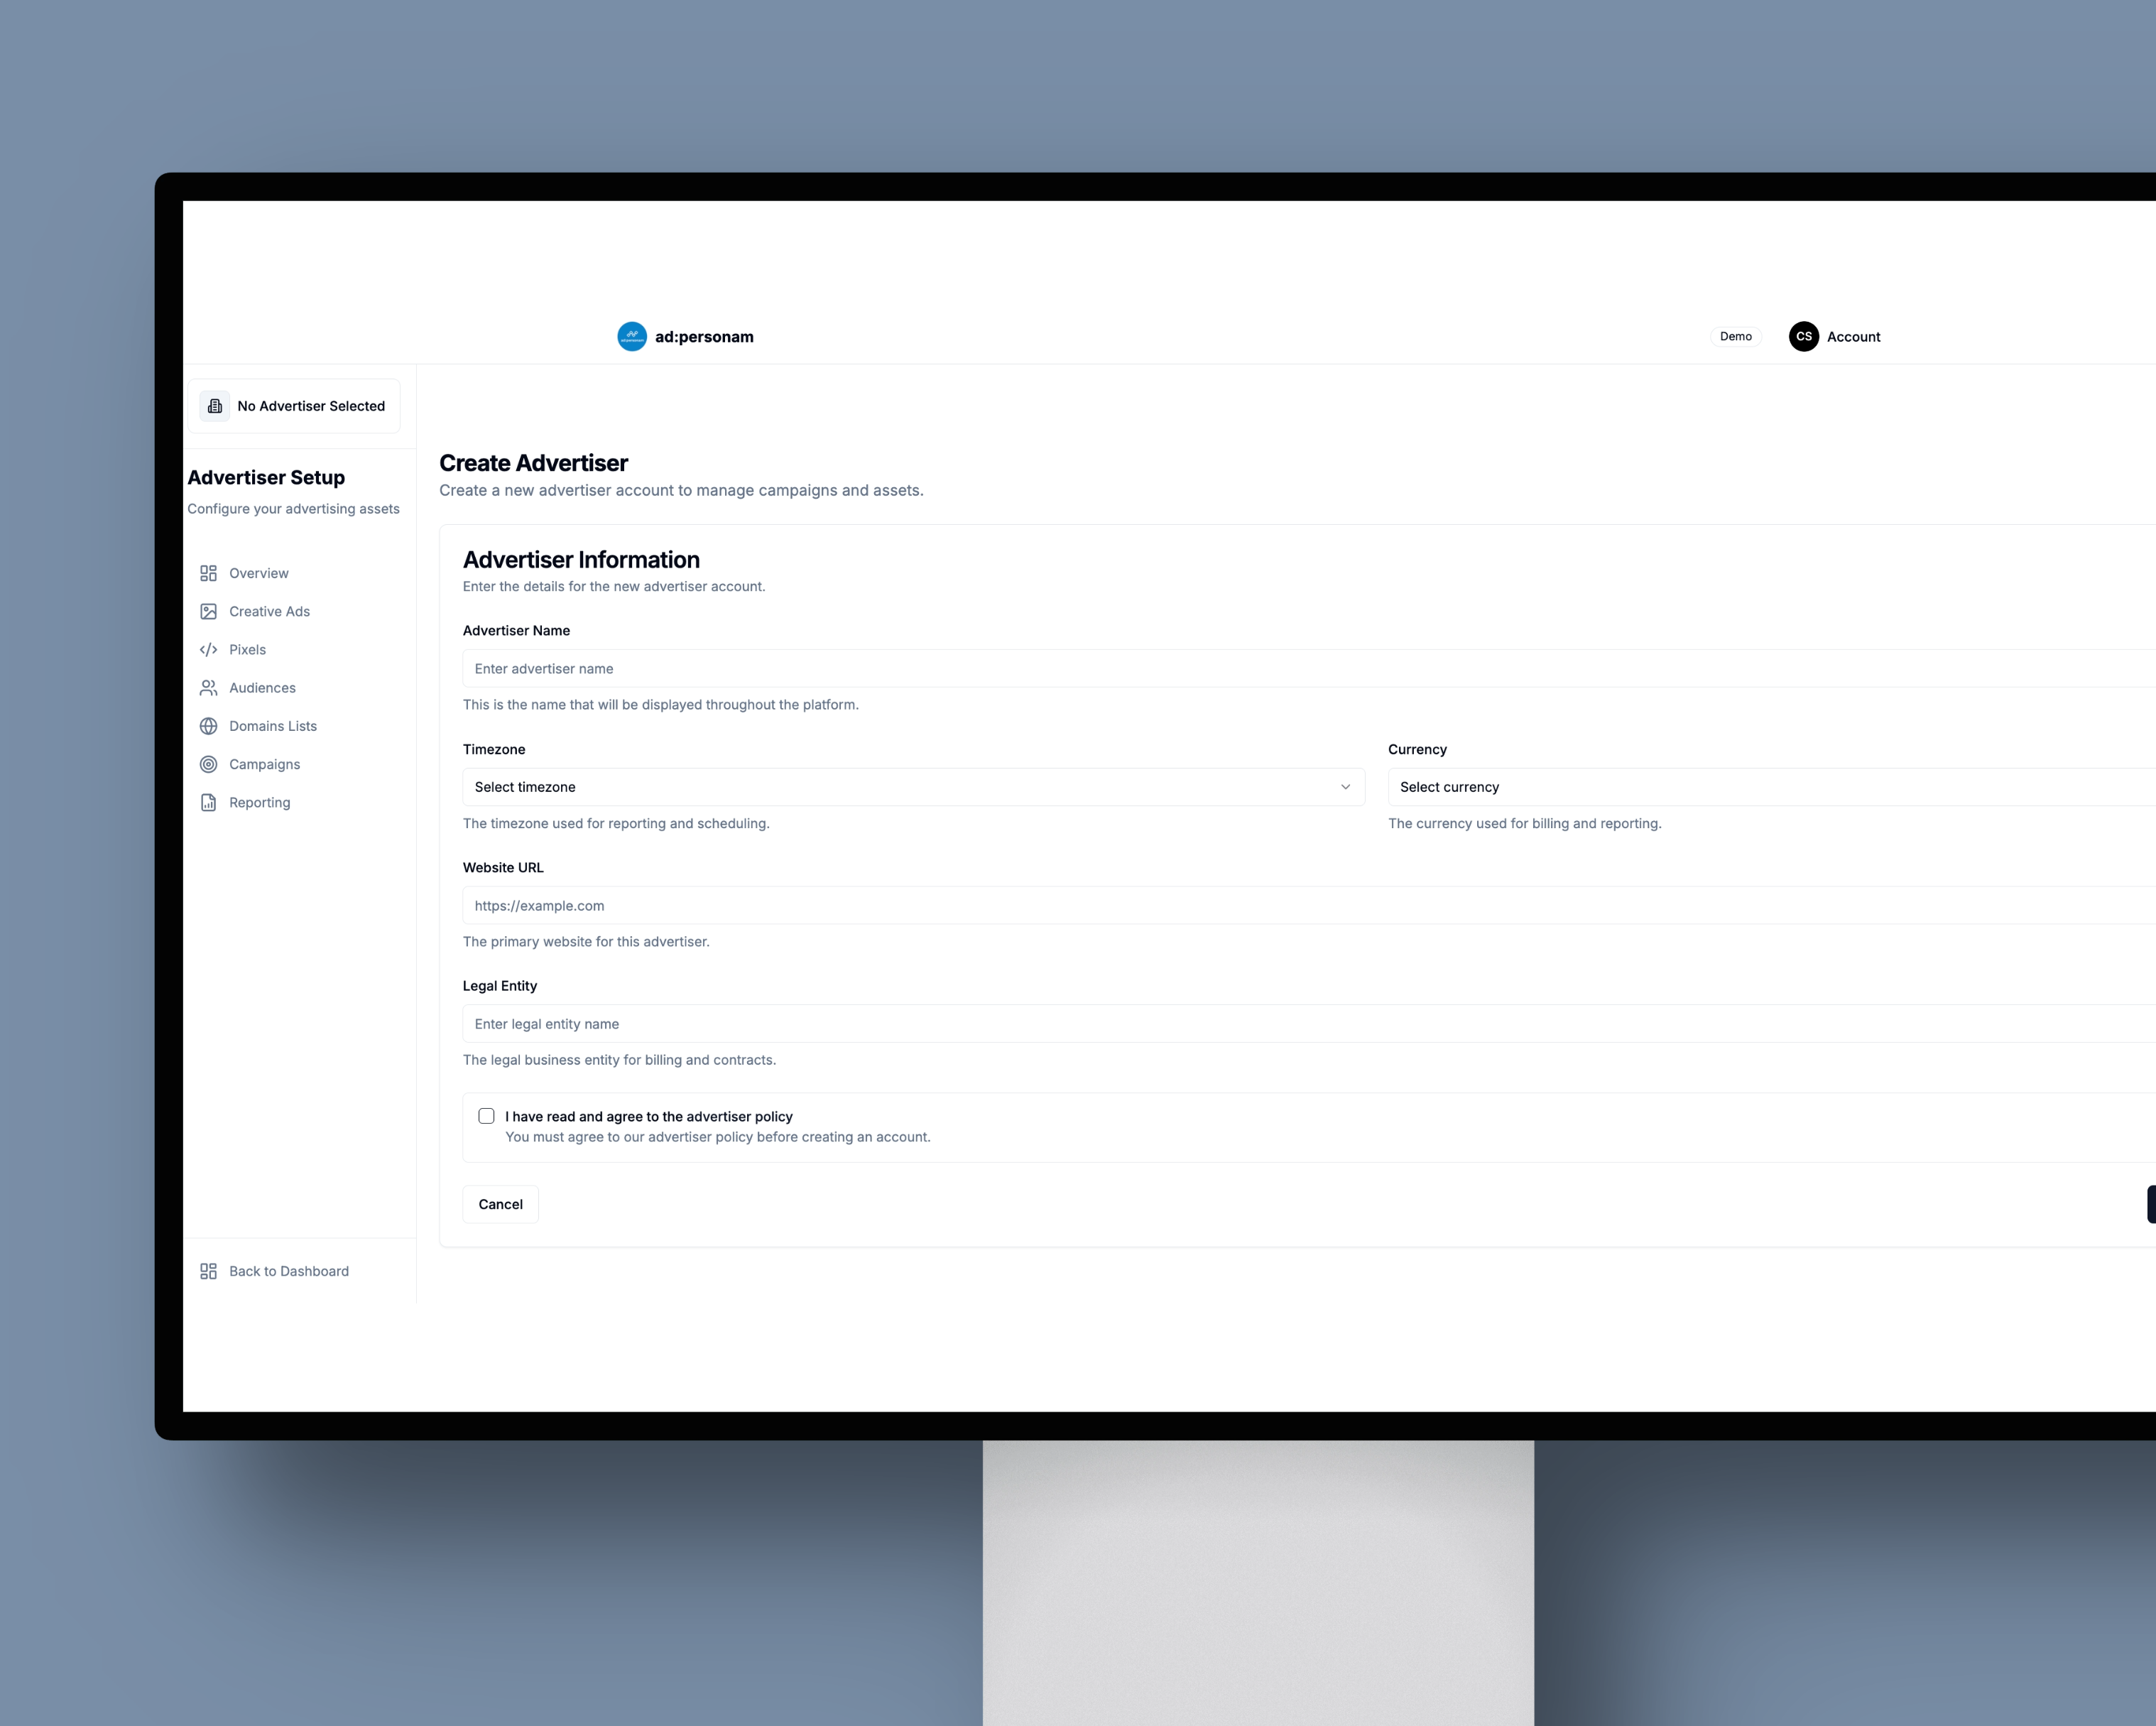
Step 1: Access the Creation Form
Navigate to your ad:personam dashboard and click "Create New Advertiser" to open the Advertiser Form.
Step 2: Complete Your Advertiser Profile
Fill out these essential fields:
📝 Advertiser Name
- Enter your brand or business name exactly as you want it to appear
- This will be visible in all campaign reporting and management
🌍 Advertiser Timezone
- Select your business timezone
- This affects campaign scheduling and performance data reporting
- Choose the timezone where you'll primarily manage campaigns
💰 Select Currency
- Choose from: EUR, USD, or GBP
- This sets your default currency for all budgeting and financial reporting
- Can be changed later, but won't apply to the already created campaigns
🔗 Advertiser URL
- Provide your website URL starting with "http://" or "https://"
- Used for compliance and verification purposes
🏢 Legal Entity Name
- Input the official legal name of your business
- Required for Digital Services Act compliance in the EU
- Ensures proper legal attribution for your advertising
✅ Accept Terms and Conditions
- Review and agree to our Advertiser Policy
- Required before you can create the advertiser
Step 3: Submit and Confirm
After double-checking all information for accuracy, click Submit to create your advertiser profile.
⚠️ Remember: Once created, campaigns and ads cannot be transferred between advertisers, so ensure all details are correct!
🎯 Essential Next Steps
1. Upload Your First Creative Ad
Required for all campaigns - you need at least one approved creative to launch any campaign
📖 Follow our step-by-step ad creatives guide
2. Set Up Conversion Tracking (Recommended)
Want to use advanced optimization like Cost Per Acquisition (CPA)? You'll need conversion tracking:
- Install a conversion pixel on your website
- Verify it's working and collecting data
- Enable algorithm optimization for better campaign performance
📖 Follow our step-by-step pixel setup guide
3. Build Your Remarketing Audiences (Optional)
Create custom audiences from your website visitors to:
- Target previous visitors with special offers
- Exclude existing customers from acquisition campaigns
📖 Follow our step-by-step audience setup guide
4. Configure Domain Lists (Optional)
Protect your brand by creating:
- Blocklists: Prevent ads from appearing on unwanted websites
- Allowlists: Only show ads on approved, premium websites
📖 Follow our step-by-step domain lists setup guide
🏢 Managing Multiple Advertisers
For Agencies
Create separate advertisers for each client to ensure:
- Complete data isolation between client accounts
- Individual reporting and campaign management
- Proper legal compliance for each business entity
For Multi-Brand Businesses
Set up different advertisers for:
- Each brand or product line
- Different geographic markets
- Separate business units
🔧 Technical Requirements
Before You Launch Campaigns
Minimum Requirements:
- ✅ Completed advertiser profile
- ✅ At least one uploaded and approved creative ad
- ✅ Active subscription (Starter or PRO)
For Advanced Optimization:
- ✅ Conversion pixel installed and working
- ✅ Sufficient conversion data (recommended: 20+ conversions per week)
- ✅ Proper event tracking configured
💡 Pro Tips for Success
Choose Your Currency Wisely
- Consider where most of your business transactions occur
- EUR for European markets, USD for global campaigns, GBP for UK focus
Timezone Strategy
- Use your primary business timezone for easier campaign management
- Consider your target audience's timezone for campaign scheduling
Naming Convention
- Use clear, descriptive advertiser names
- For agencies: Include client name for easy identification
- Avoid special characters that might cause technical issues
🎉 Congratulations! You've successfully created your advertiser and laid the foundation for powerful, organized advertising campaigns. You're now ready to upload creatives, set up tracking, and launch your first campaign on ad:personam!